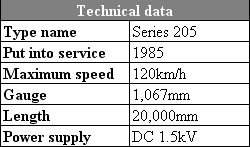
Series 205; JNR economical electric commuter
JNR; Japanese National Railways had been faced with serious economic problem since 1964; the first year when they felt into the red. Besides, we Japanese found it necessary to conserve energy through what we call "oil shock" at the beginning of '70s. JNR put series 201 into service in 1979. It was called "energy saving commuter" because it needed more little electricity to work than the conventional ones. However, its cost of manufacturing was too high for JNR to improve their economic outlook.
 I can say that series 205 was JNR's last gasp. It not only inherited the energy saving concept of series 201 but also was maximally brought production and operating cost down. That came from several newer technologies such as field added excitation control, bolsterless truck, stainless boby, and so on. The development period was actually for seven months. The engineers that resolved a lot of difficult tasks during the brief period should be deserving of praise. Even their efforts could not change JNR's destiny. JNR was privatized and split up to JR in 1987, soon after series 205 was born. That means series 205 is the last commuter produced by JNR.

Series 205 survived and kept playing an important role in urban commuting although JNR was disappeared. JR east and west put several variations based on series 205 in the beginning of '90s. They are still alive on the commuting lines around Tokyo and Osaka though they are recently being replaced to the successor; series E231 or 321.
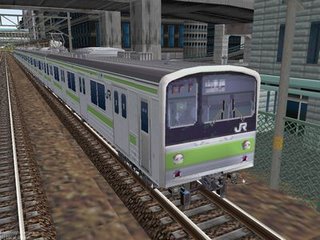
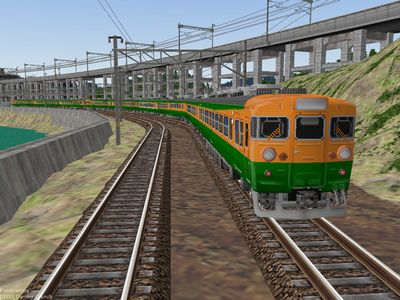
As I wrote, series 205 has several variations. Bahnsim PRO includes the first type put into Yamanote-line; the loop line in Tokyo.
 I can say that series 205 was JNR's last gasp. It not only inherited the energy saving concept of series 201 but also was maximally brought production and operating cost down. That came from several newer technologies such as field added excitation control, bolsterless truck, stainless boby, and so on. The development period was actually for seven months. The engineers that resolved a lot of difficult tasks during the brief period should be deserving of praise. Even their efforts could not change JNR's destiny. JNR was privatized and split up to JR in 1987, soon after series 205 was born. That means series 205 is the last commuter produced by JNR.
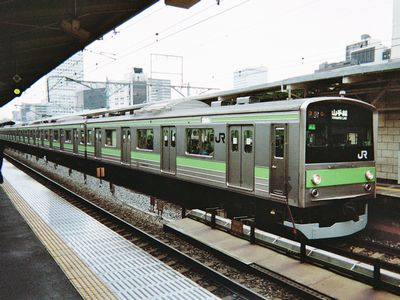
Series 205, photo by Shinden
Series 205 survived and kept playing an important role in urban commuting although JNR was disappeared. JR east and west put several variations based on series 205 in the beginning of '90s. They are still alive on the commuting lines around Tokyo and Osaka though they are recently being replaced to the successor; series E231 or 321.
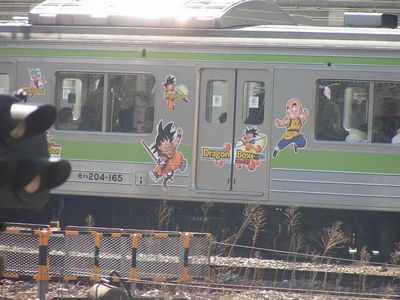
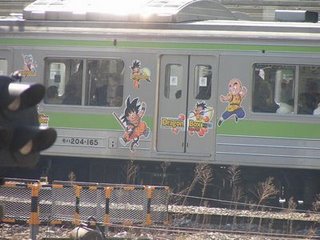
Series 205 with Dragon Ball rapping, photo by toukaidou211
As I wrote, series 205 has several variations. Bahnsim PRO includes the first type put into Yamanote-line; the loop line in Tokyo.

Series 205 on Bahnsim PRO
posted by ghost at 1:43 am
0 comments
![]()


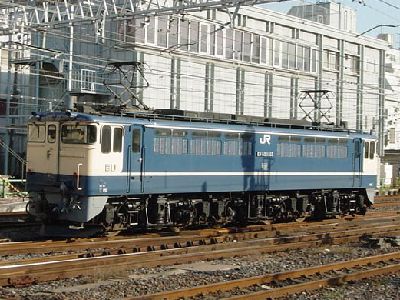
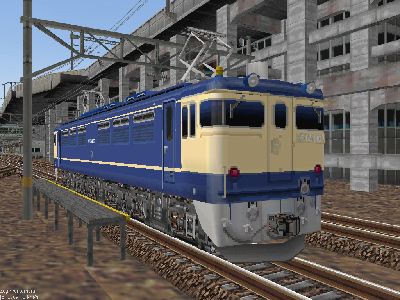
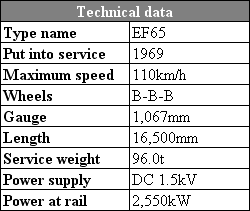 EF65 has four subcategories as follows.